Joomla! Template 002043 Description
The Joomla template 002043 is designed specifically for VirtueMart powered websites. You can set up your online shop in minutes using the professional VirtueMart template from AS Designing Studio. It is delivered with proper arrangement of content, clearly-defined featured blocks, stylish background in contrasts to effective page elements. It is based on the Bootstrap Framework. The Bootstrap Framework makes it fully responsive to all screen resolutions and aspect ratios. Moreover, thus it carries a lot of useful features, for instance additional HTML5 elements, set of CSS components, grid system and much more.
The premium package should be unzipped before installation.
There are two ways how to install the Joomla template:
1. Install Joomla template using Quickstart installation package, so it will looks exact like the demo preview
(premium version only)
2. Manual template installation and modules configuration
1. Joomla Template installation using Quickstart package
To help novice users with configuration of CMS - we provide packages called QuickStart.
A quickstart is basically a fully functional and customized Joomla! package containing the default Joomla installation package, all modules,
choosen template and plugins with all the configurations and data in one place. The sample data in the quickstart package
is also personalised according to the template and is much different to the sample data found in the default Joomla package.
-
Uploading
If you have any Joomla installed on your server you need uninstall it first.
Take the as002xxx_quickstart.zip file and upload it on your server via FTP or any other software provided to you by your hositng provider, after uploading unzip the zip file directly on the server. If you don't have an option for unzipping it on your server the package should be first unzipped on your localhost/PC and then uploaded on the server.
-
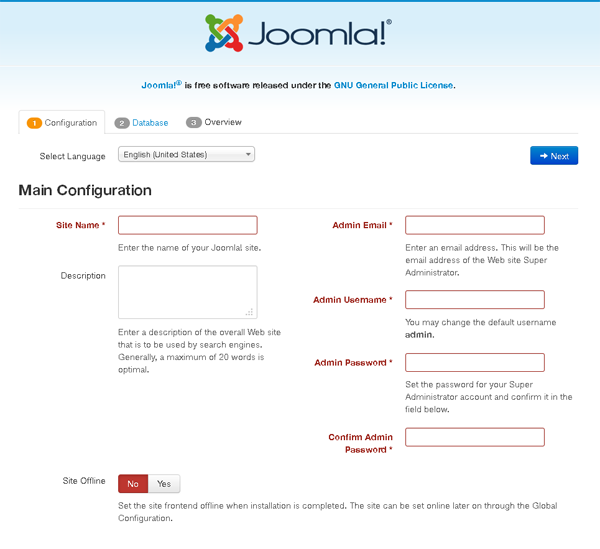
Begining of installation procedure - Main configuration
Open your web browser and navigate to the folder that you uploaded your package to.
Your url might look like this https://www.mysite.com/joomla/index.php.
First please choose the language, then fill out all requred filds.
Due to security reasons as a user name we recommend other name than 'admin'.
Click 'Next' button.
-
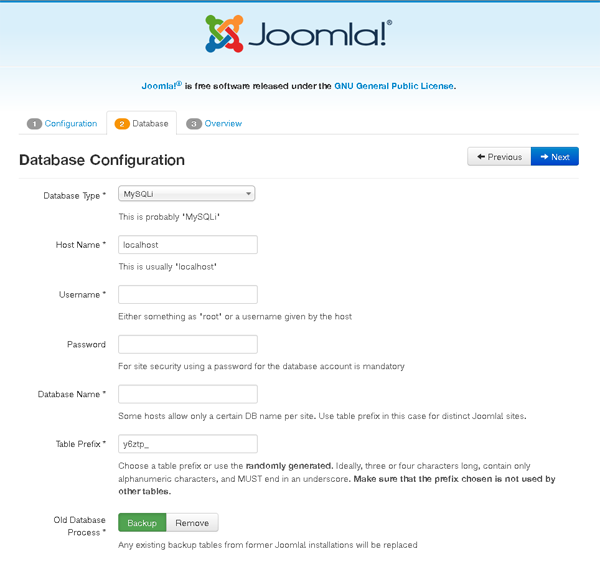
Database configuration
The details you enter here are important as this is where the actual information for your Joomla
installation are going to be stored.
Put all needed information here and click 'Next' button to procced to most imoptant step.
-
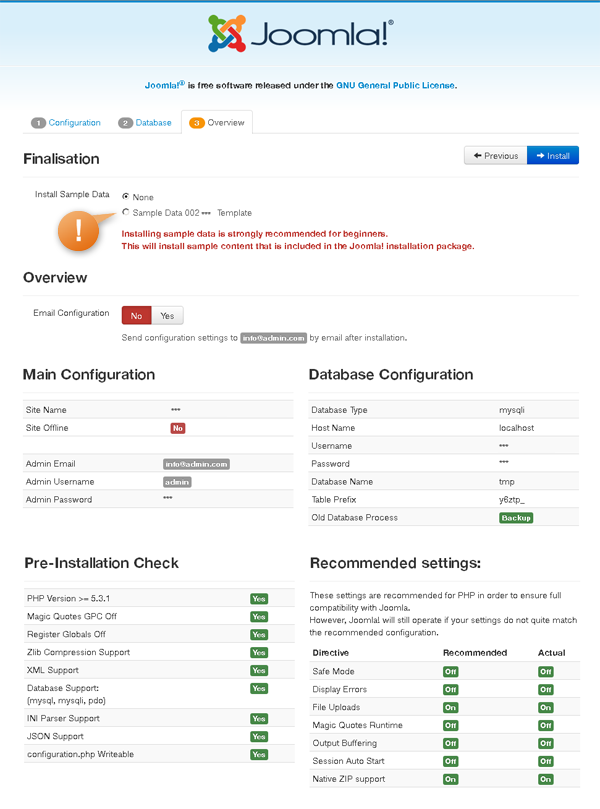
Finalisation
Most important on this page is Sample Data Installation.
Without installing the sample data you will not have your site looks like our demo preview.
You have to click on the 'Sample Data Template' radio button in case to install the demo package content.
Also, this page will give you a sense of your server compatibility. You will need to troubleshoot any of the flagged
areas that are unsuitable for a Joomla installation before you continue here. Please mind that every potential
wrong setting can bring many headaches. Once you get installed the Template Sample Data and the all clear ...
click 'Install' button.
-
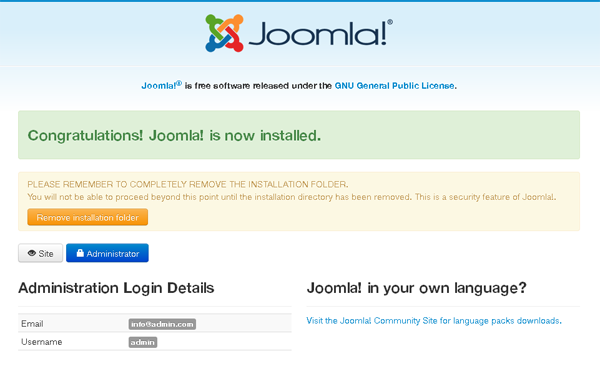
Congratulations!
When the installation is succeeded you should reach the final page that tells you that your Joomla! is installed.
Now you should remove install folder otherwise you can't login to admin or visit website frontend.
Once you have done that you should successfully be able to navigate to the front end of your site
and see the template set up exactly the same way as the demo site.
2. Manual template installation and modules configuration
Joomla template does not come with any demo content.
Template is only predefined layout of possible modules positions including the main website graphics like header, logo or footer.
-
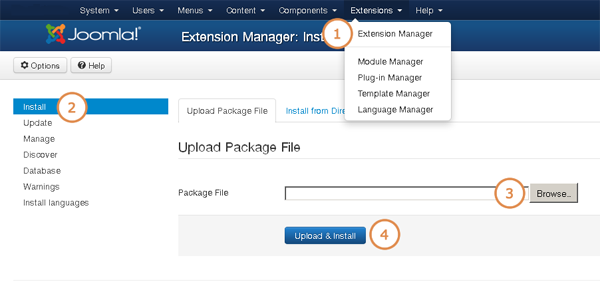
In the administration section of your Joomla! website go to the "Extensions -> Extension Manager -> Install".
-
In the "Upload package file" section browse for the as002xxx_template.zip file by clicking on the "Browse" button.
-
Click "Upload & install".
-
Install and config all plugins and extensions from the extensions folder.
